Contents
- Stages of cultivation
- List of items needed
- Preparation of spore suspension
- The subtleties of the process
- Examples of varieties for beginners
Introduction
!!! Attention, this manual is for information purposes only and is not a call to action. Follow the laws of the country you live in!!!
In today's world, interest in mushrooms continues to grow, attracting the attention of researchers, archaeologists, pharmacologists, and enthusiasts. An important part of the process of obtaining homegrown mushrooms is the proper preparation of the spore suspension. In this article, we will review the steps and principles of spore suspension preparation from a spore print.
Stages of mushroom cultivation
First step
- Creating the spore suspension, syringe the spores to conveniently transfer the spores to the grain where they will grow.
Second step
- creating a sterile growth medium for the transition from spore to mycelium. The grain serves here as a material base for the future fungus.
The third stage
- The process of mycelium growth in the jar under certain external and internal conditions.
Fourth stage
- Preparation of substrate and the creation of a living fungus using pure mycelium from the jar.
Fifth stage
- Fruiting stage of mushroom culture. Formation and growth of mushrooms in the greenhouse. Harvesting mushrooms and the continuation of the cycle (the next wave of growth).
What do I need to make a spore suspension?
The process of making a spore suspension is the actual beginning of the mushroom cultivation process. At this stage, the spores move from the preservation phase to the active phase and are prepared for inoculation. A spore suspension is a syringe of water with a quantity of spores inside. The suspension is the most convenient method of transferring spores (inoculation) to the substrate of the mother mycelium (grain).
List of items needed
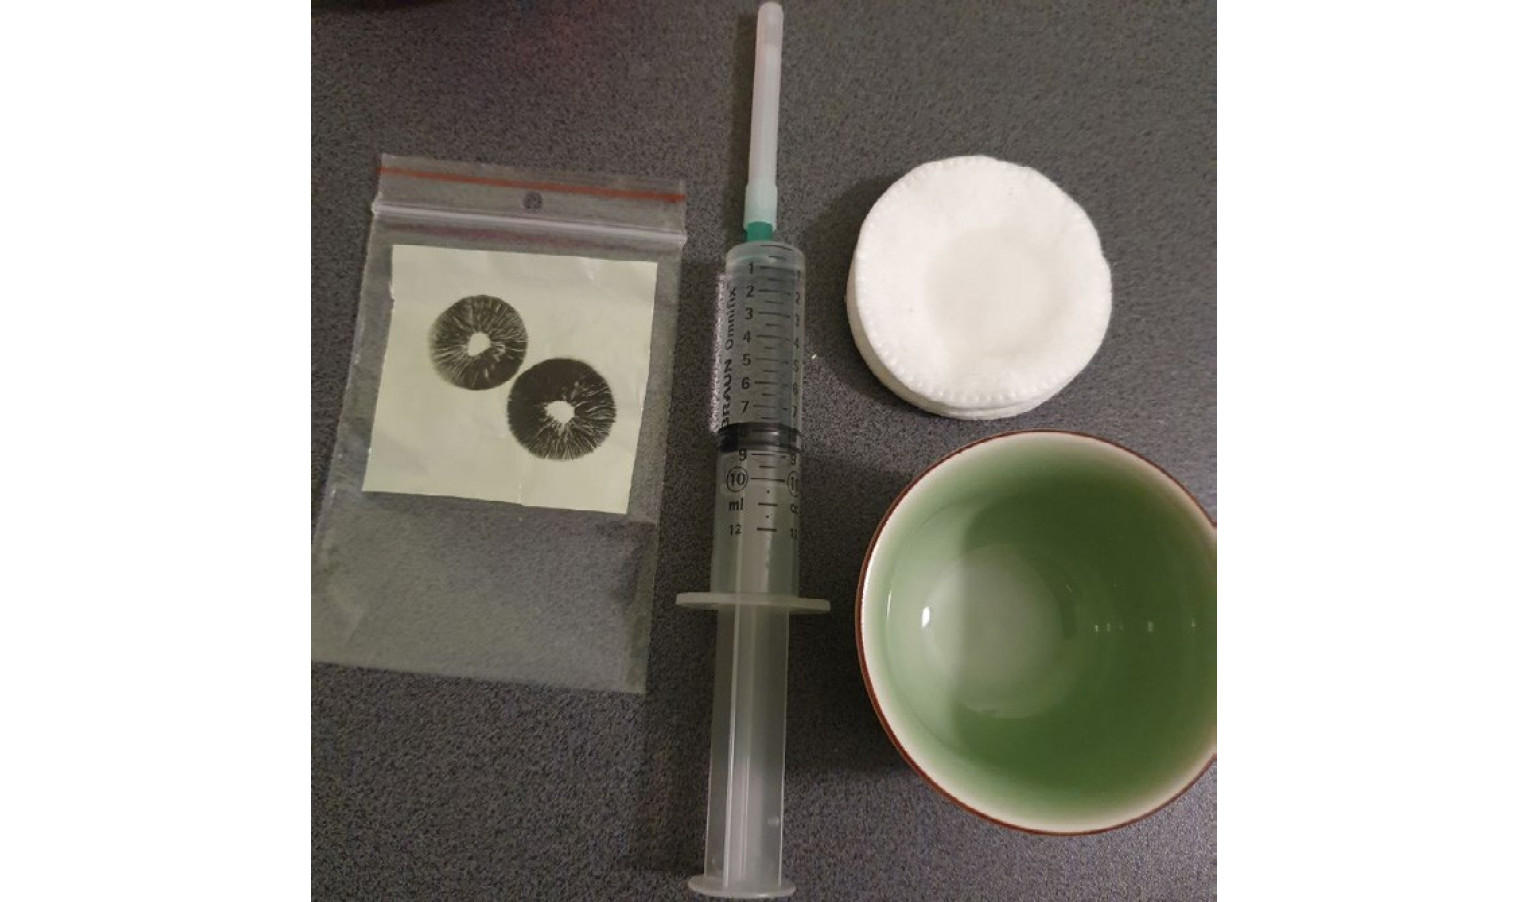
1. Spore print (print).
2.Sterile syringe with a needle with a volume of 10 - 20 ml.
3.Water for injection
4. Cotton disks
5. Alcohol
6. Small cup or shot glass
7. Medical gloves and face mask (very desirable)
8. Quartz lamp (optional)
Preparation of spore suspension
The method of preparing the suspension consists of several steps performed sequentially, quickly but confidently, without haste or fuss:
1. Clean objects and hands well with alcohol, wipe the inside of the cup and the work surface. Optionally: use gloves and face mask; treat the space with a quartz lamp.
2. Draw into the syringe water for injection, 10 - 20 ml., depending on the required amount of suspension.Water can be used and simple, then it is necessary to draw boiling water into the syringe and let it cool down.
3.Open the bag with the print, carefully pull out the print over the cup and "peel off" about 1\10 part of the spore print with a needle. The spores will fall into the cup as you do this.
4. Squeeze some water from the syringe into the cup, mixing the spores with the pressure of the jet from the needle and immediately draw the water back into the syringe. In 2 - 4 such repetitions it is possible to draw in most of the spores.
5. Expel bubbles from the syringe, if air got inside, wipe the needle with alcohol, close the syringe. The suspension is ready and can be sent to a closed cupboard for several days. It is recommended to keep the suspension for at least 2 days. This will give the spores time to "wake up" and significantly reduce the start time of mycelium growth at the next stage

